How To Trim Earmold Tubing
Learn how to trim new earmold tubing for your child’s hearing aid.
Print:
When you get a new earmold, it comes with long tubing. You will need to cut the tubing to the right size.
Some Tips To Remember:
- Check the earmold to make sure it is on the correct hearing aid. You will see a red mark on the right hearing aid and a blue mark on the left hearing aid.
- Measure twice, cut once!
- It is better to cut off a little at a time. You can always cut off more if needed.
Steps To Cut the Tubing
Step 1:
- Put the earmold in the ear.
- Hang the hearing aid over the ear in its normal resting position.
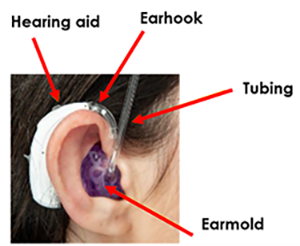
- Line up the long tubing of the earmold with the earhook. The earhook is the curved part of the hearing aid that helps it from falling off the ear.
Step 2:
- With a pen or marker, mark where the tubing hits the top of the earhook notch.

Step 3:
- Remove the earmold from the child’s ear.
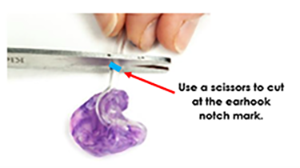
- Use a scissors to cut the tubing at the earhook notch mark.
- Note: It is better to cut off a little at a time. You can always cut off more if needed for the best fit.
Step 4:
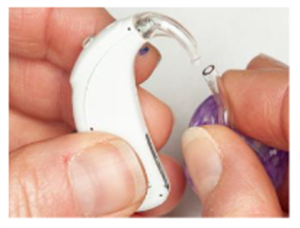
- Attach the tubing to the hearing aid.
- Carefully wiggle the tubing over the earhook notch. It may be tight.
Step 5:
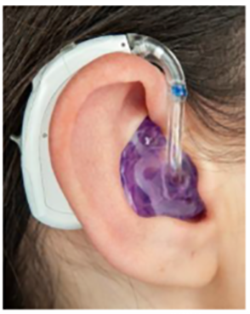
- Place the tubing on your child’s ear.
- Check to see if it is too long or too short.
Draft Number: 2250
This content was created to help you care for your child and/or family member. It does not take the place of medical care. Talk with your healthcare provider for diagnosis, treatment and follow-up.